Home and Garden
10 DIY Headboard Ideas to Upgrade Your Bedroom
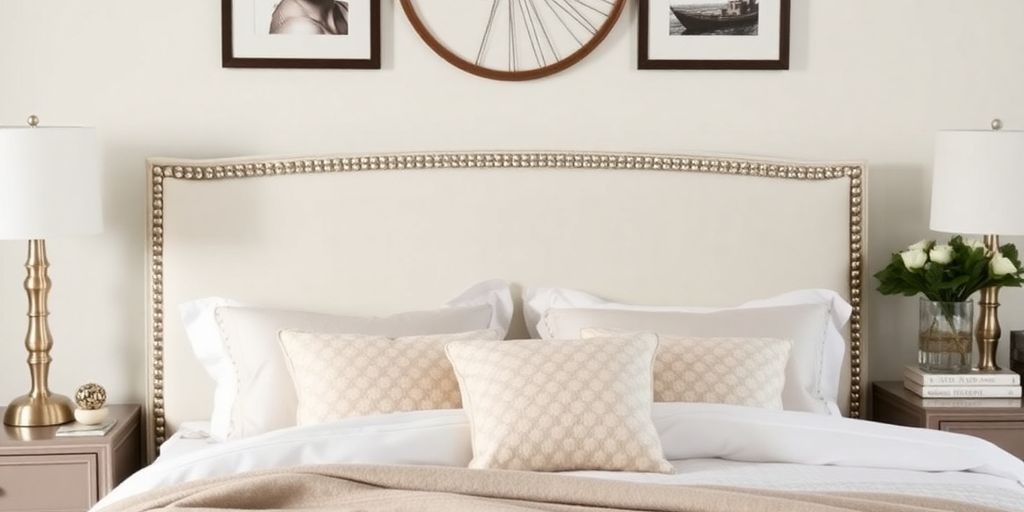
If you’re looking to refresh your bedroom without breaking the bank, DIY headboards are a fantastic option. These creative projects not only enhance the look of your space but also allow you to express your personal style. From rustic wooden designs to sleek leather finishes, there are countless ways to make a headboard that suits your taste. Here are ten inspiring DIY headboard ideas to help transform your bedroom into a stylish retreat.
Key Takeaways
- DIY headboards can be made from affordable materials like wood and fabric.
- Adding a headboard can dramatically change the look of your bedroom.
- Personalise your headboard with colours and textures that reflect your style.
- Some headboards can be easily updated with paint or removable cushions.
- Crafting your own headboard allows for creativity and uniqueness in your space.
1. Leather Headboard
A leather headboard can bring a touch of elegance to your bedroom. It combines modern style with a classic feel, making it a versatile choice for any decor. Here’s how to create your own:
Materials Needed:
- Leather fabric (or faux leather)
- Plywood board
- Foam padding
- Staple gun
- Scissors
- Measuring tape
Steps to Create Your Leather Headboard:
- Measure the width of your bed and cut the plywood to size.
- Cut the foam padding to fit the plywood, then attach it using the staple gun.
- Lay the leather over the foam, ensuring it’s taut, and staple it to the back of the plywood.
- Hang the headboard on the wall above your bed using brackets.
Benefits of a Leather Headboard:
- Durability: Leather is long-lasting and easy to clean.
- Style: It adds a sophisticated touch to your bedroom.
- Comfort: Provides a soft surface to lean against while reading or watching TV.
A leather headboard not only enhances the look of your room but also offers a cosy spot to relax. Transform your space effortlessly with this stylish addition!
2. Stacked Wood Headboard
Creating a stacked wood headboard is a fantastic way to add a rustic touch to your bedroom. This DIY project is not only budget-friendly but also allows you to showcase your creativity. Here’s how to get started:
Materials Needed
- Various sizes of wood planks (reclaimed wood works great)
- Wood glue
- Nails or screws
- Sandpaper
- Stain or paint (optional)
Steps to Create Your Headboard
- Choose Your Wood: Select different sizes of wood planks to create depth and interest.
- Cut to Size: Measure and cut the wood to fit the width of your bed.
- Arrange the Planks: Lay out the planks in a pattern you like before attaching them.
- Attach the Planks: Use wood glue and nails or screws to secure the planks together.
- Finish: Sand the edges for a smooth finish and apply stain or paint if desired.
Tips for Success
- Mix different wood types for a more eclectic look.
- Ensure the headboard is securely attached to the wall for safety.
- Consider adding a protective finish to enhance durability.
A stacked wood headboard can transform your bedroom into a warm and inviting space, making it a perfect project for those who love minimalist home decor.
This project not only enhances your bedroom’s aesthetic but also allows you to express your personal style. Enjoy the process and let your creativity shine!
3. Nailhead Trimmed Headboard
Creating a nailhead trimmed headboard can add a touch of elegance to your bedroom. This stylish design is not only visually appealing but also relatively easy to make. Here’s how you can do it:
Materials Needed
- Plywood (cut to your desired headboard size)
- Foam padding or batting
- Upholstery fabric (enough to cover the plywood)
- Nailhead trim (available at craft stores)
- Staple gun and staples
- Hammer
- Scissors
Steps to Create Your Headboard
- Cut the plywood to the size you want for your headboard.
- Attach foam padding to the plywood using a staple gun, ensuring it’s smooth and secure.
- Lay the upholstery fabric over the foam, pulling it taut and stapling it to the back of the plywood.
- Position the nailhead trim along the edges of the headboard, hammering them in place for a polished look.
- Mount the headboard to the wall or attach it to your bed frame.
Tips for Success
- Choose a fabric that complements your bedroom decor.
- Ensure the nailheads are evenly spaced for a professional finish.
- Consider using a contrasting fabric for a unique look.
A nailhead trimmed headboard can transform your bedroom into a luxurious retreat, making it a worthwhile DIY project.
By following these steps, you can create a stunning headboard that showcases your personal style and enhances your bedroom’s atmosphere. Nailhead trim adds a sophisticated touch that elevates the overall design.
4. Double Headboard
Why settle for just one headboard when you can have two? A double headboard not only adds style but also helps define each person’s side of the bed. Here’s how you can create your own:
Materials Needed
- Two headboards (can be the same or different styles)
- Wall brackets or mounting hardware
- Paint or fabric (optional)
Steps to Create a Double Headboard
- Choose your headboards: Select two that complement each other or go for a mix of styles for a unique look.
- Prepare the wall: Ensure the wall is clean and ready for mounting.
- Mount the headboards: Use wall brackets to securely attach each headboard to the wall, ensuring they are level.
Benefits of a Double Headboard
- Personalisation: Each person can choose their own style, making the bed feel more personal.
- Visual Interest: A double headboard creates a striking focal point in the room.
- Space Efficiency: It can help in smaller rooms by utilising vertical space effectively.
A double headboard can transform your bedroom into a stylish retreat, making it feel more inviting and personal.
Incorporating a double headboard is a fantastic way to upgrade your bedroom without breaking the bank. This DIY project is not only fun but also allows you to express your creativity and style. Remember, it’s all about making your space feel like home!
5. Hung Cushion Headboard
Creating a hung cushion headboard is a stylish and comfortable way to enhance your bedroom. This design not only adds a soft touch but also serves as a unique focal point. Here’s how to make one:
Materials Needed
- Cushions (various sizes)
- Fabric of your choice
- Wall brackets or hooks
- Strong adhesive or sewing kit
Steps to Create Your Headboard
- Choose your cushions: Select cushions that match your bedroom decor. You can mix and match sizes and colours for a more dynamic look.
- Prepare the fabric: If you want to cover the cushions, cut the fabric to size and secure it using adhesive or by sewing.
- Mount the cushions: Use wall brackets or hooks to hang the cushions at your desired height above the bed. Ensure they are securely fastened to avoid any accidents.
Tips for Success
- Consider using different textures to add depth.
- Ensure the cushions are easy to clean, especially if they will be used frequently.
- Experiment with the arrangement before mounting to find the best layout.
A hung cushion headboard can transform your bedroom into a cosy retreat, making it a perfect spot for relaxation and sleep. Personalised touches can enhance the overall aesthetic, making it uniquely yours.
This DIY project is not only budget-friendly but also allows for creativity and personal expression in your bedroom design. Enjoy the process and make it your own!
6. Barn Door Headboard
If you love farmhouse style, a barn door headboard is a fantastic choice! This DIY project can add a rustic charm to your bedroom, making it feel warm and inviting. Here’s how to create your own barn door headboard:
- Choose Your Materials: You’ll need wood planks, hinges, and a latch. You can use reclaimed wood for a more authentic look.
- Measure and Cut: Measure the width of your bed and cut the wood planks to size. A standard queen bed typically requires a headboard that is about 60 inches wide.
- Assemble the Door: Lay the planks side by side and secure them with horizontal supports on the back. Attach the hinges to one side to allow it to swing open if desired.
- Finish the Wood: Sand the surface and apply your choice of stain or paint. Popular options include distressed white, grey, or rustic brown.
- Mount the Headboard: Securely attach the headboard to the wall or the bed frame, ensuring it is stable and safe.
Benefits of a Barn Door Headboard
- Versatile Design: Fits well with various decor styles.
- Customisable: You can choose any colour or finish to match your room.
- Space-Saving: Ideal for smaller rooms as it can be mounted directly to the wall.
A barn door headboard not only serves as a focal point but also brings a touch of rustic elegance to your space. It’s a perfect way to showcase your personal style while enhancing the overall aesthetic of your bedroom.
7. Colorful Wood Headboard

Creating a colourful wood headboard can transform your bedroom into a vibrant space. This DIY project is not only fun but also allows you to express your creativity. Here’s how to get started:
- Choose Your Wood: Select different types of wood or wood panels. You can use reclaimed wood for a rustic look or new wood for a cleaner finish.
- Pick Your Colours: Decide on a colour scheme. Bright colours can energise the room, while softer tones can create a calming effect.
- Cut and Arrange: Cut the wood to your desired sizes and arrange them in a pattern that appeals to you. You can go for stripes, blocks, or even a mosaic design.
- Paint: Apply your chosen colours to the wood. You can paint each piece a different colour or create a gradient effect.
- Assemble: Once the paint is dry, attach the pieces to a backing board or directly to the wall.
Benefits of a Colourful Wood Headboard
- Personalisation: You can customise it to match your style.
- Cost-Effective: This project can be done on a budget, especially if you use reclaimed materials.
- Easy to Update: If you want a change, simply repaint or rearrange the wood.
A colourful headboard can be a focal point in your bedroom, making it feel more inviting and lively.
Tips for Success
- Use a mix of textures and finishes for added interest.
- Consider adding lights or shelves to enhance functionality.
- Don’t be afraid to experiment with different shapes and sizes of wood pieces.
8. Classic Tufted Headboard
A classic tufted headboard can add a touch of elegance to your bedroom. This style is not only stylish but also comfortable. You can create your own tufted headboard with some basic materials and a bit of creativity. Here’s how to do it:
Materials Needed:
- Plywood (for the base)
- Foam padding (for comfort)
- Fabric of your choice (to cover the headboard)
- Upholstery buttons (for the tufted effect)
- Staple gun and staples
- Drill and drill bits
Steps to Create Your Tufted Headboard:
- Cut the plywood to your desired headboard size.
- Attach foam padding to the plywood using a staple gun.
- Cover the foam with your chosen fabric, pulling it tight and stapling it to the back of the plywood.
- Mark where you want the buttons to go and drill holes through the plywood and foam.
- Sew buttons through the holes to create the tufted look, pulling the fabric tight as you go.
- Mount the headboard to the wall or attach it to your bed frame.
Tips for Success:
- Choose a fabric that complements your bedroom decor.
- Use a bold colour or pattern to make a statement.
- Ensure the buttons are evenly spaced for a professional look.
A tufted headboard can transform your bedroom into a luxurious retreat, making it a perfect DIY project for anyone looking to upgrade their space.
By following these steps, you can create a stunning headboard that not only looks great but also enhances your comfort while you sleep. This project is a fantastic way to express your personal style and make your bedroom feel more inviting.
9. Shiplap Headboard
A shiplap headboard can bring a rustic charm to your bedroom. This style is not only trendy but also quite easy to create. Here’s how you can make one:
Materials Needed
- Shiplap boards (or similar wood)
- Wood screws
- Sandpaper
- Paint or wood stain (optional)
- Wall anchors (if needed)
Steps to Create Your Shiplap Headboard
- Measure your bed to determine the size of the headboard.
- Cut the shiplap boards to the desired length, ensuring they fit snugly behind your bed.
- Sand the edges to avoid splinters and achieve a smooth finish.
- Attach the boards together using wood screws, creating a solid panel.
- Paint or stain the headboard to match your bedroom decor.
- Secure the headboard to the wall using wall anchors for stability.
Benefits of a Shiplap Headboard
- Affordable: Using reclaimed wood can save you money.
- Customisable: You can paint or stain it any colour you like.
- Easy to install: With basic tools, you can have it up in no time.
A shiplap headboard not only enhances your bedroom’s aesthetic but also adds a touch of warmth and character to the space.
This DIY project is a fantastic way to express your creativity while upgrading your bedroom’s look. Consider pairing it with soft bedding and decorative pillows for a complete transformation!
10. Painted White Headboard
Sometimes, a simple coat of paint can work wonders in transforming your bedroom. A painted white headboard can instantly refresh your space and create a clean, modern look. Here’s how you can achieve this:
Steps to Create a Painted White Headboard:
- Choose Your Frame: Start with an old headboard or a simple wooden frame.
- Prep the Surface: Sand down any rough spots and clean the surface to ensure the paint adheres well.
- Apply Primer: Use a primer to help the paint stick better and to enhance the final colour.
- Paint: Apply two to three coats of white paint, allowing each coat to dry completely.
- Finish: Once dry, you can add a clear sealant for extra durability.
Benefits of a Painted White Headboard:
- Versatile Style: It complements various bedroom styles, from modern to rustic.
- Brightens the Room: White reflects light, making your space feel larger and more open.
- Easy to Update: If you want a change, simply repaint it in a different colour.
A painted white headboard is not just a piece of furniture; it’s a statement that can elevate your entire bedroom aesthetic.
Tips for Success:
- Use high-quality paint for a smoother finish.
- Consider using a spray paint for an even coat.
- Don’t rush the drying process; it’s key to a professional look.
With just a few materials and some time, you can create a stunning headboard that enhances your bedroom’s charm. Transform your space with this simple DIY project!
Final Thoughts on DIY Headboards
In conclusion, creating your own headboard can truly transform your bedroom into a personal haven. With a variety of styles to choose from, whether you prefer a sleek leather look or a rustic wooden design, there’s something for everyone. Not only can these DIY projects save you money, but they also allow you to express your creativity. Remember, even a simple coat of paint or some cushions can make a big difference. So, gather your materials and get started on your headboard project today—your dream bedroom is just a few steps away!
-

 Press Release5 days ago
Clinical Trials Market Set for Robust Growth, Driven by Drug Development Surge and Digital Innovation
-

 Press Release6 days ago
Green Bio Chemicals Market Poised for Sustainable Growth amidst Global Shift to Eco-Friendly Alternatives by 2035
-

 Press Release6 days ago
Fill-Finish Pharmaceutical Contract Manufacturing Market Expected to Flourish Amid Biopharmaceutical Boom and Global Outsourcing Trend by 2035
-

 Press Release5 days ago
Industrial Boiler Market Expected to Surpass USD 24.4 Billion by 2035 Amid Growing Demand for Energy Efficiency and Industrialization
-

 Business7 days ago
How Managed IT Solutions Help Small Teams Compete at Enterprise Scale
-

 Press Release5 days ago
Preventive Vaccines Market to Witness Strong Growth by 2035
-

 Press Release6 days ago
Pet Food Nutraceutical Market Set for Robust Expansion Amid Rising Demand for Pet Wellness by 2035
-

 Press Release5 days ago
Waterproof Structural Adhesives Market: A Comprehensive Study Towards USD 10.3 Billion in 2035


