Entertainment
Mastering OBS Studio: A Comprehensive Guide for Streamers and Content Creators

So, you wanna get into streaming or making videos? OBS Studio is one of the best tools out there, and guess what? It’s free! It might look a little complicated at first glance, but trust me, it’s not too bad once you get the hang of it. This guide is gonna walk you through everything, from getting it set up to making your streams look really good. We’ll cover all the basics and even some cool tricks to help you create awesome content. Let’s get started with OBS Studio!
Key Takeaways
- OBS Studio helps you stream and record videos.
- It’s free to use and works for many things.
- You can set up scenes and add different video and audio parts.
- It lets you go live on popular sites like YouTube and Twitch.
- You can also record high-quality videos for later.
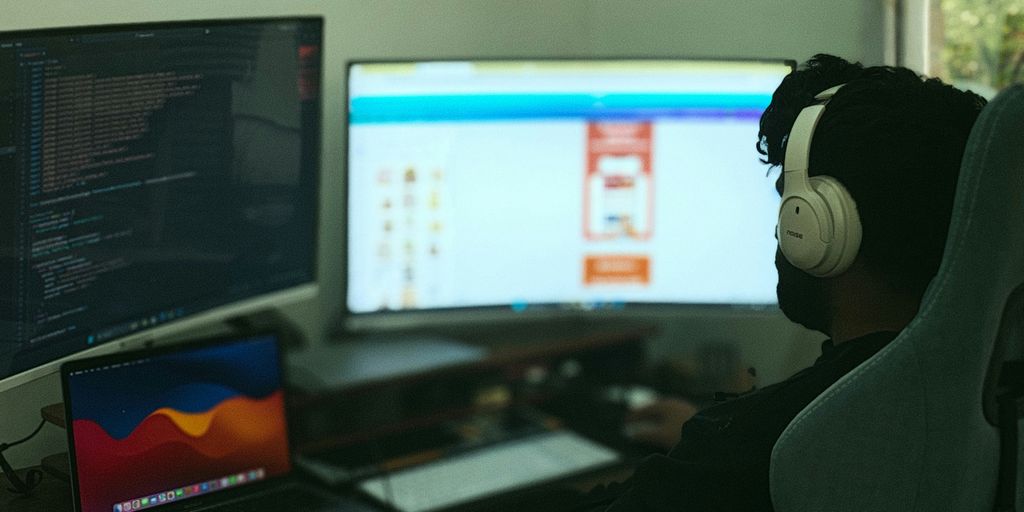
Getting Started with OBS Studio
Installing and Configuring OBS Studio
Okay, so you’re ready to jump into the world of streaming and content creation? Awesome! The first step is getting OBS Studio installed and set up correctly. It’s free, which is a huge plus, but there are a few things to keep in mind during the installation. Make sure you download the latest version from the official website to avoid any compatibility issues or bugs. During the installation, pay close attention to the components it offers to install; you might want to skip the browser source plugin if you don’t plan on using web pages directly in your streams.
Once installed, run OBS Studio. You’ll probably be greeted with a mostly blank screen, which can be a little intimidating, but don’t worry, we’ll get to that. The initial configuration is key to a smooth experience, so take your time and double-check everything.
Initial Setup with the Auto-Configuration Wizard
OBS Studio has this handy thing called the Auto-Configuration Wizard. It’s like a little helper that figures out the best settings for your system. When you first launch OBS, it should pop up automatically. If it doesn’t, you can find it under the ‘Tools’ menu. The wizard asks you a few questions about how you plan to use OBS – whether you’re primarily streaming or recording, and what your target resolution and frame rate are. It also tests your internet speed to determine the optimal bitrate for streaming.
It’s generally a good idea to run this wizard, especially if you’re new to OBS. However, keep in mind that it’s just a starting point. You might need to tweak the settings later on to get the perfect balance between quality and performance. For example, if you’re planning to use premium app building with AppMySite, you might want to prioritize recording quality over streaming.
Understanding the OBS Studio Interface
Alright, let’s talk about the OBS Studio interface. It might look a bit complex at first, but once you understand the different sections, it becomes much easier to navigate. Here’s a quick rundown:
- Scenes: These are like different layouts for your stream or recording. You can switch between scenes to show different content, like a gameplay screen, a webcam view, or a title card.
- Sources: These are the individual elements that make up your scenes, such as your webcam, your game capture, images, text, and more.
- Mixer: This is where you control your audio levels. You can adjust the volume of your microphone, your game audio, and any other audio sources you have.
- Transitions: These are the effects used when switching between scenes. You can choose from simple fades, stinger transitions, or create your own custom transitions.
- Controls: This section contains buttons for starting and stopping your stream or recording, accessing the settings menu, and more.
Understanding these core components is key to mastering OBS Studio. Take some time to explore the interface and get familiar with where everything is located. Don’t be afraid to click around and experiment – that’s the best way to learn!
Building Your Scenes and Sources in OBS Studio
Alright, so you’ve got OBS Studio installed and you’re ready to start making some magic. This section is all about building the foundation of your stream or recording: scenes and sources. Think of scenes as different sets, and sources as the individual elements within those sets. It’s like directing a play, but instead of actors, you’re using cameras, screen captures, and more.
Creating and Managing Scenes
Scenes are the building blocks of your OBS setup. Each scene is a different arrangement of sources, allowing you to switch between various layouts during your stream or recording. I usually start by creating a few basic scenes:
- Starting Soon: A static image or video loop to show before you go live.
- Gameplay: Your main scene with game capture and webcam overlay.
- Just Chatting: A scene with just your webcam and maybe a chat window.
- Be Right Back: A screen to display when you need a short break.
To create a new scene, just click the "+" button in the "Scenes" panel, give it a name, and you’re good to go. You can rename or remove scenes by right-clicking on them. Don’t be afraid to experiment! I’ve got like, 20 scenes in my main setup, some of which I barely use, but it’s good to have options. You can also easily multistream with OBS by setting up different scenes tailored to each platform.
Adding and Arranging Video Sources
Sources are the individual elements that make up your scenes. These can include:
- Video Capture Device: Your webcam or capture card.
- Display Capture: Captures your entire monitor.
- Window Capture: Captures a specific application window.
- Game Capture: Captures gameplay from a specific game.
- Image: Displays a static image.
- Text (GDI+): Adds text overlays.
To add a source, select your scene, then click the "+" button in the "Sources" panel. Choose the type of source you want to add, and configure its properties. For example, if you’re adding a "Video Capture Device," you’ll need to select your webcam from the dropdown menu. Arranging sources is as simple as dragging them around in the preview window. You can also resize them by dragging the handles on the corners. Play around with the order of your sources too; the order in the list determines which sources are on top. It’s all about finding what looks best for you. Remember to check your encoder settings to ensure optimal video quality.
Integrating Audio Inputs and Mixers
Audio is just as important as video, maybe even more so. Nobody wants to watch a stream with bad audio. OBS Studio lets you add and manage multiple audio inputs, including:
- Microphone/Auxiliary Audio: Your main microphone input.
- Desktop Audio: Captures audio from your computer’s speakers.
To add an audio input, click the "+" button in the "Sources" panel and select the appropriate audio input type. You can then adjust the volume levels of each input in the "Audio Mixer" panel. This is where you can balance the levels of your microphone, game audio, and any other audio sources you have. A good tip is to keep your microphone level slightly higher than your game audio, so your voice is always clear. You can also add filters to your audio inputs, such as noise suppression and noise gate, to improve the audio quality. These filters can really help clean up your audio and remove background noise. Experiment with different settings to find what works best for your setup.
Mastering Live Streaming with OBS Studio
Live streaming can seem daunting, but OBS Studio gives you the tools to broadcast to the world. It’s not just about hitting the ‘Start Streaming’ button; it’s about understanding how to optimize your setup for the best possible viewer experience. Let’s get into the details.
Connecting to Streaming Platforms
First things first, you need to tell OBS where to send your stream. This involves grabbing the stream key and server URL from your chosen platform – whether it’s Twitch, YouTube, Facebook, or another service. The process is similar across platforms, but the exact location of these details varies.
Here’s a general outline:
- Log into your streaming platform account.
- Navigate to the live dashboard or streaming setup area.
- Locate your stream key and server URL. These are usually found in the encoder settings section.
- In OBS Studio, go to Settings > Stream.
- Select your streaming service from the dropdown menu or choose ‘Custom’ if your platform isn’t listed.
- Enter the server URL and stream key into the corresponding fields.
- Click ‘Apply’ and ‘OK’.
Now OBS knows where to send your video and audio!
Optimizing Bitrate and Encoder Settings
This is where things get a little technical, but it’s worth understanding. Bitrate determines the amount of data used per second for your stream, and encoder settings affect the quality and performance. Finding the right balance is key. You can find the best OBS settings online.
- Bitrate: A higher bitrate generally means better video quality, but it also requires a faster internet connection. If your upload speed isn’t high enough, you’ll experience buffering and lag. Most platforms have recommended bitrate ranges. For example, 1080p at 60fps typically needs between 4500 and 6000 kbps. Experiment to find what works best for your setup and audience.
- Encoder: x264 is a software encoder that uses your CPU. It’s a good option if you have a powerful processor. NVENC (Nvidia) and AMF (AMD) are hardware encoders that use your graphics card. These can be more efficient, especially if you’re gaming on the same computer. Try different encoders to see which gives you the best performance without sacrificing quality. The broadcasting software is very versatile.
- Resolution and FPS: Consider your target audience and the type of content you’re streaming. 720p at 30fps is a good starting point for many streamers, but 1080p at 60fps is ideal for fast-paced games if your system can handle it. Don’t forget to check the OBS system requirements.
Here’s a simplified table of recommended bitrates based on resolution and frame rate:
| Resolution | Frame Rate | Recommended Bitrate (kbps) |
|---|---|---|
| 720p | 30fps | 2500-4000 |
| 720p | 60fps | 3500-5000 |
| 1080p | 30fps | 3500-5000 |
| 1080p | 60fps | 4500-6000 |
Multistreaming and Advanced Broadcasting
Want to reach a wider audience? Multistreaming lets you broadcast to multiple platforms simultaneously. While OBS Studio doesn’t natively support multistreaming, you can achieve this using services like Restream.io or by setting up multiple OBS instances (though this is resource-intensive). You can also use RTMP streaming to achieve this.
Advanced broadcasting techniques include:
- Adding graphic overlays: Use images, logos, and text to brand your stream and provide information to viewers.
- Using stinger transitions: Create smooth transitions between scenes with custom animations.
- Setting up alerts: Integrate services like Streamlabs to display on-screen alerts for new followers, subscribers, and donations.
- Managing multiple stream sources: Seamlessly switch between different cameras, screen captures, and other sources to keep your stream engaging.
Experiment with these techniques to create a professional and engaging live stream. Remember to always test your setup before going live to avoid any technical hiccups!
Recording High-Quality Content with OBS Studio
Okay, so you’re ready to make some videos. OBS isn’t just for live streaming; it’s a pretty solid tool for recording content too. Whether you’re making tutorials, capturing gameplay, or recording presentations, OBS can handle it. Let’s get into how to set it up for the best results.
Setting Up for Screen Recording and Tutorials
First things first, you need to configure OBS for recording. It’s a bit different than setting up for streaming. The key is to prioritize quality over low file size here. You’re not worried about bandwidth limitations like you are with streaming, so you can crank up the settings a bit. Start by creating a new scene specifically for screen recording. Add your display as a source using the "Display Capture" option. If you’re doing a tutorial and want to show your face, add your webcam as a "Video Capture Device" source. Position and resize the webcam overlay to your liking. Now, let’s tweak the settings. Go to "Settings" -> "Output". Change the "Output Mode" to "Advanced".
- Recording Path: Choose where you want your videos to be saved.
- Recording Format: MP4 is generally a good choice for compatibility.
- Encoder: If you have a decent graphics card, use NVENC H.264 (Nvidia) or AMD VCE H.264 (AMD). Otherwise, x264 will use your CPU. Experiment to see what works best for your system. You can find optimal OBS settings for your hardware.
Capturing Gameplay and Presentations
Recording gameplay is similar to screen recording, but you’ll use the "Game Capture" source instead of "Display Capture". This is generally more efficient because it only captures the game window, not your entire screen. For presentations, you can use "Window Capture" to grab the presentation software window. Make sure the game or presentation is running before you add it as a source in OBS, or it might not show up in the list. A common issue is black screen, so make sure the game or application is running before you try to capture it. Also, check the specific game capture settings, like whether it’s set to capture any fullscreen application or a specific window.
Exporting and Managing Recorded Files
Once you’re done recording, you’ll find your files in the folder you specified in the settings. Now what? Well, OBS doesn’t have built-in video editing tools, so you’ll need separate software for that. Programs like DaVinci Resolve (free), Adobe Premiere Pro (paid), or Filmora (paid) are all good options. Before editing, it’s a good idea to rename your files to something descriptive. This makes it easier to find them later. Also, consider creating a folder structure to organize your recordings by date, project, or game. Here’s a quick rundown of some useful keyboard shortcuts:
| Action | Shortcut |
|---|---|
| Copy Source | Ctrl+C |
| Paste Source | Ctrl+V |
| Remove Source | Del |
| Fit to Screen | Ctrl+F |
| Stretch to Screen | Ctrl+S |
| Center to Screen | Ctrl+D |
Advanced Techniques and Customization in OBS Studio
Okay, so you’ve got the basics down. Now it’s time to really make OBS Studio your own. This is where things get interesting, and you can start creating some truly professional-looking streams and recordings. We’re talking about taking your content to the next level with advanced features and custom setups. Let’s get into it.
Utilizing Chroma Key and Filters
Chroma key, or green screen, is a game-changer. It lets you replace a solid color background with any image or video you want. Think of it as teleporting yourself to a virtual studio! To get started, you’ll need a green (or blue) screen, good lighting, and the Chroma Key filter in OBS. Mess around with the settings until the background is completely transparent and you blend seamlessly with your chosen backdrop.
Filters are another way to enhance your video and audio. You can use them to correct colors, sharpen images, reduce noise, and more. OBS has a bunch of built-in filters, and you can even add more with plugins. Experiment with different combinations to find what works best for your style. For example, you can enhance your microphone’s sound quality using noise suppression and gain filters.
Implementing Plugins and Virtual Sets
Plugins are like add-ons for OBS Studio. They can add all sorts of new features and functionalities, from advanced scene transitions to custom scripts. The OBS community is constantly developing new plugins, so there’s always something new to discover. Some popular plugins include:
- StreamFX: Adds a ton of cool visual effects and transitions.
- NDI Tools: Allows you to send and receive video and audio over your local network.
- Move Transition: Creates smooth, dynamic scene transitions.
Virtual sets are pre-designed backgrounds that you can use to create a professional-looking studio environment. You can find free and paid virtual sets online, or even create your own using image editing software. Combine a virtual set with chroma key, and you’ll look like you’re broadcasting from a real TV studio.
Setting Up Hotkeys for Efficient Workflow
Hotkeys are keyboard shortcuts that let you control OBS Studio without having to click around with your mouse. This can save you a ton of time and effort, especially during live streams. You can assign hotkeys to just about any action in OBS, such as:
- Switching scenes
- Starting and stopping recordings
- Muting and unmuting audio sources
- Showing and hiding sources
Setting up hotkeys is easy. Just go to Settings > Hotkeys, and assign your desired keys to each action. I find it helpful to group related actions together on the keyboard for easy access. For example, you could use the number keys to switch between scenes and the function keys to control audio sources. This will help you set up OBS Studio hotkeys for a smoother workflow.
Optimizing Performance and Troubleshooting OBS Studio
Hardware Considerations for Smooth Performance
Okay, so you’re ready to stream or record, but your computer is chugging like an old train. Let’s talk hardware. OBS can be a resource hog, especially if you’re trying to do too much at once. The CPU and GPU are the two main components that OBS relies on. A decent CPU (like an Intel i5 or AMD Ryzen 5, or better) is a good starting point. For the GPU, something like an NVIDIA GeForce GTX 1660 or AMD Radeon RX 580 will handle most tasks. More powerful cards will give you more headroom for complex scenes and higher resolutions. Don’t forget about RAM! 8GB is the bare minimum, but 16GB is really where you want to be. Also, using an SSD instead of a traditional hard drive can significantly improve loading times and overall system responsiveness.
Diagnosing Common Issues and Solutions
So, what happens when things go wrong? Here’s a rundown of common problems and how to fix them:
- High CPU Usage: This is a big one. If your CPU is maxing out, OBS will start to lag and drop frames. Try these fixes:
- Lower the output resolution. Downscale the output resolution to reduce the processing load.
- Reduce the frame rate (from 60fps to 30fps, for example).
- Use a faster encoder preset (like "veryfast" or "superfast").
- Close unnecessary programs running in the background.
- Dropped Frames: Dropped frames mean your stream or recording is losing data, resulting in choppy video. This can be caused by network issues or hardware limitations. Here’s what to check:
- Your internet connection. Make sure you have a stable and fast connection.
- Your bitrate settings. If your bitrate is too high for your internet connection, you’ll drop frames. Experiment with lower bitrates.
- Hardware limitations. If your CPU or GPU can’t keep up, you’ll drop frames. See the "High CPU Usage" section above.
- Audio Problems: Audio issues can range from no sound to distorted sound. Here’s how to troubleshoot:
- Check your audio input devices in OBS settings. Make sure the correct microphone or audio interface is selected.
- Adjust the audio levels in the OBS mixer. Make sure the levels aren’t too low or too high (clipping).
- Use audio filters to reduce noise and improve clarity.
Maintaining Optimal System Resources
Keeping your system running smoothly is key to a good OBS experience. Here are some tips:
- Close Unnecessary Programs: Before you start streaming or recording, close any programs that you don’t need. This frees up CPU and RAM for OBS.
- Update Your Drivers: Make sure your graphics card drivers are up to date. New drivers often include performance improvements and bug fixes.
- Monitor Your System: Use the Windows Task Manager (or a similar tool on other operating systems) to monitor your CPU, GPU, and RAM usage. This can help you identify bottlenecks and troubleshoot performance issues.
- Optimize Your Scenes: Keep your scenes as simple as possible. Avoid using too many sources or complex effects, as these can put a strain on your system. Consider using OBS Studio hotkeys to quickly switch between scenes and sources, improving workflow and reducing on-screen clutter.
- Regularly Restart OBS: Sometimes, simply restarting OBS can resolve minor glitches and improve performance. It’s a good habit to get into, especially before long streams or recording sessions.
Integrating OBS Studio with Other Platforms
Using OBS Studio with Zoom
Okay, so you want to use OBS Studio with Zoom? It’s actually pretty cool. You can use OBS to create a virtual webcam feed for Zoom, which means you can have custom scenes, overlays, and all sorts of fancy stuff during your meetings. Instead of just showing your messy room, you can have a professional-looking background or even share your screen with cool graphics. It’s a great way to spice up those boring work calls. You’ll need to install both OBS Studio and Zoom, of course. Then, within OBS, you’ll start the virtual camera. In Zoom, you just select the OBS Virtual Camera as your webcam. Boom! Instant upgrade. It’s a game changer for presentations and online teaching. You can find a lot of tutorials online that walk you through the specifics, but that’s the gist of it. It’s not too hard, I promise. You can even use OBS Studio to record your Zoom meetings with all the fancy overlays, which is super useful for creating training materials or just keeping a record of important discussions. Just remember to get everyone’s permission before recording, of course. It’s all about being professional, even when you’re having fun with tech. This is a great way to use OBS with Zoom.
Streaming to YouTube, Twitch, and Facebook Live
OBS Studio is awesome because it lets you stream to pretty much any platform you can think of. YouTube, Twitch, Facebook Live – you name it. The basic idea is the same for all of them: you grab the stream key and server URL from the platform, and then you plug those into OBS. It’s in the settings under "Stream." Then, you hit "Start Streaming," and you’re live! Each platform has its own quirks, though. For example, YouTube is picky about thumbnails, and Twitch is all about the chat. Facebook Live is… well, it’s Facebook Live. But OBS handles all the technical stuff, so you can focus on creating content. Here’s a quick rundown:
- YouTube: Make sure your account is verified and you have streaming enabled. Use a good thumbnail!
- Twitch: Get familiar with Twitch’s community guidelines. Engage with your chat!
- Facebook Live: Be aware of Facebook’s copyright policies. Promote your stream beforehand!
It’s also worth experimenting with different encoder settings for each platform. What works great on YouTube might not be ideal for Twitch, and vice versa. It’s all about finding the sweet spot for your setup and your audience. Don’t be afraid to tweak things until you get it right. And remember, good audio is just as important as good video. Nobody wants to watch a stream with terrible sound. So, invest in a decent microphone and learn how to use the audio mixer in OBS. It’ll make a huge difference. You can also use a multistreaming platform to stream to multiple platforms at once.
Connecting with Professional Broadcasting Services
If you’re serious about streaming, you might want to look into professional broadcasting services. These services offer a bunch of extra features that you don’t get with the free platforms, like better reliability, higher quality streams, and dedicated support. They often have their own custom integrations with OBS Studio, which can make things a lot easier to set up. Think of it like upgrading from a bicycle to a sports car. It’s still a way to get around, but it’s a whole different experience. Some of these services also offer things like cloud-based encoding, which can take some of the load off your computer. This is especially useful if you’re streaming at high resolutions or with a lot of complex scenes. Plus, they often have tools for managing your streams, like scheduling, analytics, and monetization. It’s a big step up, but if you’re trying to build a professional streaming career, it can be worth the investment. Just do your research and find a service that fits your needs and your budget. There are a lot of options out there, so take your time and compare them carefully. You can also use professional broadcasting services to improve your stream quality.
Wrapping Things Up
So, there you have it. OBS Studio might seem like a lot at first, but once you get the hang of it, it’s pretty amazing what you can do. We’ve gone over the basics, talked about some cool features, and hopefully, given you a good starting point. Remember, practice makes perfect. Don’t be afraid to mess around with the settings, try new things, and just have fun with it. Your streams and videos will only get better from here. Happy creating!


ETHRA AI Reports Strong Early Momentum as Stage 1 Presale Reaches 11% Completion

Understanding Comparative Negligence in Jacksonville Personal Injury Cases

LiquidWhales Goes Live: The First Hyperliquid Whale Tracker That Grades Every Wallet Net of Fees — and Lets You Copy the Winners in One Click

SolForger Launches as a Non-Custodial Solana Developer Platform for Builders, Creators, and On-Chain Projects

Securing the Future: Jayen Consulting Officially Migrates to a New Digital Domain

Focusing on Compliance, Truoux Advances MAS License Application

Truoux Advances UK FCA License Application, Deepens Compliance Strategic Layout

Truoux Optimizes Risk Control and AML Systems, Accelerating the RMO and DAX License Application Process

Rovum Builds Momentum in On-Chain Settlement Markets

Is Professional Mold Testing Worth It?

Why Small Shipping Boxes Are Becoming the Default for 25-unit Trial Runs

Radio Ads and Personal Spending: Where Prosecutors Allege the Dynamic Money Millions Went

The $34 Million Deception: Where the Guam Charity Bingo Money Really Went

Celeste White’s Influence on Sustainable Agricultural Practices in Napa Valley

Inside the 12-Count Federal Indictment Against Fugitive Darren Anthony Robinson