Real Estate
Lighting the Way: How to Design and Install Landscape Lighting for Safety, Security, and Beauty
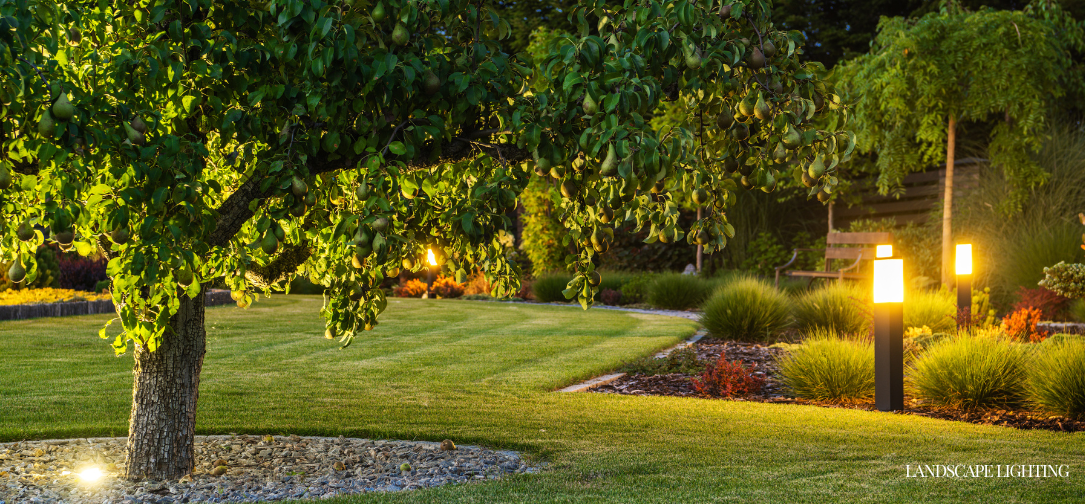
Landscape lighting is much more than a decorative feature for your home or garden. It is an essential element that serves multiple purposes: enhancing the beauty of your outdoor spaces, improving safety by illuminating walkways and steps, and providing security by deterring unwanted visitors. The right lighting can transform a dark, uninviting yard into a warm, welcoming environment, highlighting the architectural features of your home and extending the usability of outdoor spaces well into the night.
This article will guide you through the entire process of designing and installing landscape lighting, from understanding the different types of lighting and their purposes to practical tips on installation and maintenance. Whether you’re a DIY enthusiast or planning to hire a professional, this comprehensive guide will help you achieve a balanced, effective lighting plan that meets your safety, security, and aesthetic needs.
Understanding the Basics of Landscape Lighting
Before diving into the design and installation process, it’s crucial to understand the basics of landscape lighting. This includes familiarizing yourself with the different types of lights, their purposes, and how they interact with the environment.
1. Types of Landscape Lighting
Landscape lighting can be broadly categorized based on its function and placement. Each type serves a specific purpose, and a well-designed lighting plan will typically incorporate several of these elements.
- Path Lights: These are small fixtures installed along walkways, driveways, and garden paths. Path lights enhance safety by illuminating potential hazards like steps and uneven surfaces, and they also add a decorative element to your landscape.
- Spotlights and Uplights: These are used to highlight specific features of your landscape, such as trees, statues, or architectural details of your home. Spotlights are typically focused, creating a dramatic effect, while uplights are placed on the ground and directed upwards to accentuate vertical elements.
- Downlights: Downlights are mounted high and directed downwards to create a natural, moonlit effect. They are often used in trees or on structures to illuminate larger areas without the harsh glare of more direct lighting.
- Floodlights: These provide broad, powerful illumination and are often used for security purposes. Floodlights are typically placed near entry points, such as doors or garages, to deter intruders.
- Wall Wash Lights: These lights are used to wash walls or fences with soft, even light, creating a soothing backdrop for your outdoor space.
- Deck and Step Lights: These small fixtures are embedded into deck surfaces, stairs, or railings, providing safety by illuminating areas that could be trip hazards.
- Accent Lights: These are versatile lights used to draw attention to specific features, such as garden beds, water features, or sculptures. They can be placed at various angles to create different effects.
2. Lighting Techniques and Effects
The placement and type of lighting you choose will create different effects in your landscape. Understanding these techniques can help you design a lighting plan that balances functionality with aesthetics.
- Silhouetting: This technique involves placing a light source behind an object to create a silhouette effect. It works well with trees, sculptures, or other large features, adding a dramatic touch to your landscape.
- Shadowing: Shadowing is achieved by placing a light in front of an object, casting its shadow onto a surface like a wall or fence. This technique creates depth and visual interest, especially when used with trees or shrubs that have interesting shapes.
- Grazing: Grazing involves placing lights close to a textured surface, such as a stone wall or tree bark, to highlight its texture. This technique adds dimension and drama to your landscape.
- Moonlighting: Moonlighting mimics the natural light of the moon by placing lights high in trees and directing them downward through the branches. This creates a soft, dappled light that adds a magical quality to your outdoor space.
- Up-lighting: Up-lighting is used to highlight tall elements, such as trees, statues, or columns, by placing lights at ground level and directing them upwards. This technique can create a striking, dramatic effect.
- Cross Lighting: This technique involves placing two lights on opposite sides of an object to highlight its features from multiple angles. Cross lighting is particularly effective for statues, fountains, or other focal points in your landscape.
- Wall Washing: Wall washing creates a soft, even light that illuminates a large area. It’s ideal for lighting up walls, fences, or hedges, providing a gentle backdrop for the rest of your landscape.
Designing Your Landscape Lighting Plan
Creating a landscape lighting plan involves more than just choosing the right fixtures. It requires careful consideration of the overall design, taking into account the layout of your property, the features you want to highlight, and the practical aspects of safety and security.
1. Assessing Your Landscape
The first step in designing your landscape lighting is to assess your property. Take a walk around your yard during the day and at night, noting the areas that could benefit from lighting. Consider the following aspects:
- Focal Points: Identify the key features of your landscape that you want to highlight, such as trees, statues, water features, or architectural details of your home.
- Pathways and Entrances: Determine the main walkways and entrances to your property. These areas should be well-lit to ensure safety and security.
- Dark Areas: Look for areas that are poorly lit and could be potential security risks. These might include the sides and back of your house, secluded corners, or large, unlit sections of your yard.
- Functional Areas: Consider the areas where you spend the most time, such as patios, decks, or outdoor dining spaces. These areas should be adequately lit for comfort and usability.
- Natural Features: Take note of any trees, shrubs, or other landscaping elements that could be enhanced with lighting. Also, consider how the natural surroundings, such as neighboring properties or a nearby forest, might influence your lighting design.
2. Setting Your Objectives
Once you’ve assessed your landscape, set clear objectives for your lighting plan. These objectives should balance aesthetics with practical considerations. Common objectives include:
- Enhancing Safety: Ensure that all pathways, steps, and entry points are well-lit to prevent accidents and guide visitors safely through your property.
- Improving Security: Use lighting to deter intruders by eliminating dark areas and providing visibility around the perimeter of your property.
- Highlighting Features: Create a visually appealing landscape by accentuating key features, such as trees, sculptures, or architectural details, with strategically placed lighting.
- Creating Ambiance: Design a lighting plan that enhances the mood of your outdoor spaces. Soft, warm lighting can create a cozy, inviting atmosphere, while more dramatic lighting can add excitement and interest.
- Extending Usability: Extend the usability of your outdoor spaces by ensuring that areas like patios, decks, and gardens are well-lit, allowing you to enjoy them even after dark.
3. Choosing the Right Fixtures
With your objectives in mind, you can now choose the appropriate fixtures for each area of your landscape. Consider the following factors when selecting fixtures:
- Style and Design: The style of your lighting fixtures should complement the overall design of your home and landscape. Choose fixtures that blend seamlessly with your existing decor or make a statement by selecting more decorative options.
- Light Source: Landscape lighting fixtures are available with various light sources, including incandescent, halogen, fluorescent, and LED. LED lights are the most energy-efficient and long-lasting option, making them ideal for most outdoor lighting applications.
- Light Color and Temperature: The color temperature of your lighting can significantly impact the mood of your landscape. Warm white lights (2700K-3000K) create a cozy, inviting atmosphere, while cooler white lights (4000K-5000K) provide a brighter, more modern look.
- Durability and Weather Resistance: Outdoor lighting fixtures must be durable and weather-resistant to withstand the elements. Look for fixtures made from materials like aluminum, stainless steel, or brass, which offer excellent corrosion resistance and longevity.
- Energy Efficiency: Consider energy-efficient options, such as LED lights and solar-powered fixtures, to reduce energy consumption and lower your electricity bills. Solar lights are particularly useful for areas that are difficult to wire, though they may not provide as much brightness as wired options.
4. Planning the Layout
The layout of your landscape lighting is crucial to achieving a balanced, cohesive look. Follow these guidelines to create an effective lighting layout:
- Layer Your Lighting: Layering involves using different types of lighting to create depth and dimension in your landscape. Combine ambient, task, and accent lighting to achieve a balanced, dynamic look.
- Avoid Overlighting: Too much light can create a harsh, unnatural appearance and detract from the beauty of your landscape. Aim for subtle, understated lighting that enhances rather than overwhelms.
- Focus on Key Areas: Prioritize lighting in areas that are most important for safety, security, and visual impact. This includes entry points, pathways, and focal features.
- Consider Shadows: Use lighting to create interesting shadows that add depth and texture to your landscape. For example, uplighting a tree can cast dramatic shadows on the ground, while downlighting from a tree branch can create a soft, moonlit effect.
- Space Fixtures Appropriately: Avoid placing fixtures too close together, which can create an overly bright, cluttered appearance. Space path lights evenly along walkways, and ensure that spotlights and floodlights are angled to avoid glare.
5. Safety and Electrical Considerations
Safety should be a top priority when designing and installing landscape lighting. Improper installation can lead to electrical hazards, so it’s important to follow safety guidelines and consider hiring a professional electrician if you’re not experienced with electrical work.
- Voltage: Low-voltage lighting (12 volts) is the safest and most common option for landscape lighting. It’s easier to install than line-voltage (120 volts) lighting and poses less risk of electrical shock.
- Wiring: Plan your wiring layout carefully to avoid overloading circuits and ensure that wires are properly buried or hidden to prevent damage. Use weatherproof connectors and junction boxes to protect against moisture and corrosion.
- GFCI Outlets: Install ground fault circuit interrupter (GFCI) outlets for all outdoor electrical connections. GFCI outlets help protect against electrical shock by shutting off power if a fault is detected.
- Timers and Sensors: Use timers and motion sensors to control your landscape lighting automatically. This can enhance security, save energy, and ensure that your lights are only on when needed.

Installing Your Landscape Lighting
With your design plan in place, it’s time to install your landscape lighting. Whether you’re doing it yourself or hiring a professional, following these steps will help ensure a successful installation.
1. Gather Your Tools and Materials
Before you begin, gather all the tools and materials you’ll need for the installation. This may include:
- Lighting fixtures
- Low-voltage transformer
- Low-voltage wire
- Wire connectors
- Junction boxes
- GFCI outlets
- Timer or motion sensor
- Drill and drill bits
- Shovel or trenching tool
- Wire stripper and cutter
- Screwdriver
- Voltage tester
2. Install the Transformer
The transformer is a critical component of a low-voltage lighting system. It converts the standard 120-volt household current to the 12 volts needed for your landscape lighting. To install the transformer:
- Mount the Transformer: Choose a location near an outdoor GFCI outlet, preferably in a sheltered area. Mount the transformer on a wall or post at least 1 foot above the ground.
- Connect to Power: Plug the transformer into the GFCI outlet. If the transformer has a built-in timer or photocell, set it according to your desired schedule.
- Connect the Low-Voltage Cable: Run the low-voltage cable from the transformer to the first fixture in your layout. Leave some slack in the cable to allow for adjustments.
3. Lay Out the Fixtures and Wiring
Lay out all your lighting fixtures in their designated locations according to your plan. Run the low-voltage cable from the transformer to each fixture, making sure the cable is hidden or buried to avoid tripping hazards and protect it from damage.
- Bury the Cable: Use a shovel or trenching tool to dig a shallow trench (about 6 inches deep) along the path of the cable. Place the cable in the trench and cover it with soil or mulch.
- Connect the Fixtures: Attach each fixture to the low-voltage cable using weatherproof wire connectors. Strip about 1/2 inch of insulation from the cable ends, then twist the wires together and secure them with the connectors.
4. Test the System
Before permanently installing the fixtures, test the lighting system to ensure everything is working correctly.
- Turn On the Power: Plug in the transformer and turn on the power. Use a voltage tester to check that each fixture is receiving power.
- Adjust the Fixtures: Once you’ve confirmed that all fixtures are working, adjust their placement and angles to achieve the desired lighting effect. Ensure that path lights are evenly spaced, spotlights are directed at the correct angles, and floodlights provide adequate coverage.
5. Secure and Finish
Once you’re satisfied with the layout and performance of your lighting system, secure all fixtures and finalize the installation.
- Install the Fixtures: Secure each fixture in its final location. Path lights should be staked firmly into the ground, while spotlights and floodlights may need to be anchored or mounted on a base.
- Bury Junction Boxes: If you used any junction boxes, make sure they are properly buried and sealed to protect against moisture.
- Clean Up: Fill in any trenches or holes, and tidy up the work area. Ensure that all wires are hidden and that the fixtures are securely installed.
Maintaining Your Landscape Lighting
To keep your landscape lighting system functioning optimally, regular maintenance is essential. Follow these tips to ensure your lights continue to enhance your outdoor space for years to come:
1. Clean the Fixtures
Outdoor lighting fixtures can accumulate dirt, debris, and moisture over time, reducing their effectiveness. Clean the fixtures regularly to remove any buildup and keep them shining brightly. Use a soft cloth and mild soap to clean the lenses, and avoid using harsh chemicals that could damage the finish.
2. Check the Wiring
Periodically inspect the wiring for any signs of wear or damage. Look for exposed wires, loose connections, or corroded connectors. If you notice any issues, repair or replace the damaged components to prevent electrical hazards.
3. Replace Bulbs
Landscape lighting bulbs have a limited lifespan, so it’s important to replace them as needed. Keep a supply of replacement bulbs on hand, and check the manufacturer’s recommendations for the correct type and wattage. Consider upgrading to LED bulbs if you haven’t already, as they offer longer life and greater energy efficiency.
4. Adjust the Fixtures
Over time, plants may grow, and landscaping elements may shift, affecting the performance of your lighting system. Regularly check the placement and angles of your fixtures, and make any necessary adjustments to ensure optimal coverage and effect.
5. Maintain the Transformer
Ensure that your transformer is functioning properly and is not overloaded. If you add new lights to your system, make sure the transformer can handle the additional load. Clean the transformer housing and check the timer and photocell settings periodically.
Conclusion
Landscape lighting is a powerful tool that can transform your outdoor spaces, providing safety, security, and beauty. By carefully planning your lighting design, selecting the right fixtures, and following best practices for installation and maintenance, you can create a stunning nighttime landscape that enhances your home’s appeal and extends your enjoyment of the outdoors.
Whether you’re lighting a simple garden path or illuminating a sprawling estate, the principles and techniques outlined in this article will guide you in creating a balanced, effective lighting plan. Remember, the key to successful landscape lighting is not just about brightness but about creating an atmosphere that enhances the natural beauty of your surroundings while ensuring the safety and security of your property.
With the right approach, landscape lighting can do more than just light up the night—it can light the way to a more beautiful, inviting, and secure outdoor space.


In2space Launches Campaign to Make Space Travel Accessible for All

Inside Schedule F: Will Trump’s Federal Workforce Shake-Up Undermine Democracy?

US Stock Market Soars in May Amidst Tariff Tensions and Inflation Worries

S&P 500 Soars in Best May in Decades Amid Tariff Relief and Nvidia’s Surge

Trump’s Immigration Crackdown: Legal Battles and Policy Shifts

Trump’s Tariffs: A Global Economic Reckoning

Trump Administration’s Government Reshaping Efforts Face Criticism and Legal Battles

Attention Economy Arms Race: Reclaim Your Focus in a World Designed to Distract You

CV5 Capital Announces Standout Performance of Cryptanium Fund I SP, Beating Industry Benchmarks

Experts Warn of U.S. Slide Towards Authoritarianism Under Trump Administration

US Stocks Soar as Court Blocks Trump Tariffs and Nvidia Delivers Strong Earnings

Congress Passes Continuing Resolution, Averting Government Shutdown

Shalom Lamm on Rising Rent and the Future of Housing

US Imposes Sanctions on Sudan Over Chemical Weapons Allegations

Dow Futures Surge as Trump Postpones EU Tariffs

-
 Business4 days ago
S&P 500 Soars in Best May in Decades Amid Tariff Relief and Nvidia’s Surge
-
 Healthcare6 days ago
Attention Economy Arms Race: Reclaim Your Focus in a World Designed to Distract You
-
 Immigration4 days ago
Trump’s Immigration Crackdown: Legal Battles and Policy Shifts
-
 Government4 days ago
Trump Administration’s Government Reshaping Efforts Face Criticism and Legal Battles
-
 Business4 days ago
US Stock Market Soars in May Amidst Tariff Tensions and Inflation Worries
-
 Business4 days ago
Trump’s Tariffs: A Global Economic Reckoning
-
 Foreign Policy2 days ago
Inside Schedule F: Will Trump’s Federal Workforce Shake-Up Undermine Democracy?
-
 Press Release1 day ago
In2space Launches Campaign to Make Space Travel Accessible for All