Fitness & Wellness
DIY Outdoor Furniture Projects for a Charming Backyard

Transforming your backyard into a charming retreat can be a fun and fulfilling adventure. With a bit of creativity and some basic tools, you can create beautiful outdoor furniture that not only looks great but also fits your personal style. From pallet sofas to wine barrel tables, these DIY projects are perfect for adding character to your outdoor space while saving money. Let’s explore some simple yet stylish outdoor furniture ideas that anyone can tackle!
Key Takeaways
- Pallets are a cost-effective way to create stylish outdoor seating.
- Cinder blocks can be used for sturdy and unique benches.
- Wine barrels can be repurposed into charming tables with minimal effort.
- Customising your furniture with paint and cushions adds a personal touch.
- Safety gear and organisation are essential for a successful DIY project.
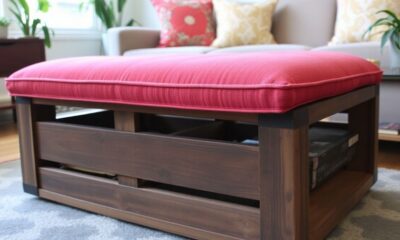
Creating a Pallet Sofa
Creating a pallet sofa is a fun and cost-effective project that can transform your outdoor space. Here’s how to do it:
Gathering and Preparing Pallets
- Find Pallets: Look for wooden pallets at local stores or online marketplaces. They are often available for free or at a low cost.
- Clean and Sand: Once you have your pallets, clean them thoroughly. Sand down any rough edges to ensure a smooth surface for sitting.
- Check for Damage: Inspect the pallets for any broken or weak parts. Discard any that are not sturdy enough.
Assembling the Sofa Structure
- Stack the Pallets: Arrange the pallets in your desired sofa shape. You can stack them for height or lay them flat for a lower profile.
- Secure with Screws: Use screws to secure the pallets together. This will ensure that your sofa is stable and safe to use.
- Adjust Height: Feel free to adjust the height based on your comfort preference.
Adding Cushions and Finishing Touches
- Choose Outdoor Cushions: Select cushions that are designed for outdoor use. They should be resistant to moisture and fading.
- Paint or Seal: Apply a coat of outdoor paint or sealant to protect the wood from the elements. This will help extend the life of your sofa.
- Accessorise: Add throw pillows or blankets to enhance comfort and style.
A pallet sofa not only provides a rustic charm but also allows you to recycle materials creatively. It’s a great way to enjoy your backyard while being eco-friendly.
By following these steps, you can create a beautiful and functional pallet sofa that will be the perfect addition to your outdoor area!
Building a Cinder Block Bench
Creating a cinder block bench is a straightforward and cost-effective project for your outdoor space. This project is perfect for DIY beginners as it requires minimal tools and materials.
Materials Needed for the Bench
- Cinder blocks (at least 8-12, depending on size)
- Wooden planks (for the seating surface)
- Outdoor paint or sealant (optional)
Step-by-Step Assembly Guide
- Gather your materials: Collect the cinder blocks and wooden planks.
- Arrange the cinder blocks: Set them in a rectangular shape, using two layers for added height and stability.
- Place the wooden planks: Lay the planks on top of the blocks. You can secure them with screws if desired.
Customising with Paint and Cushions
- Paint the cinder blocks: Use outdoor paint to add colour and personality.
- Add cushions: For comfort, place outdoor cushions on the wooden planks. This will make your bench more inviting.
A cinder block bench not only serves a practical purpose but also adds a unique touch to your garden or patio. It combines an industrial look with functionality, making it a popular choice for outdoor decor.
This bench can fit perfectly in various outdoor settings, whether in a garden, on a patio, or beside a fire pit. With a little creativity, you can easily customise it to match your style!
Crafting a Wine Barrel Table
Selecting and Preparing the Barrel
To start your project, find an old wine barrel. These can often be sourced from local wineries or home improvement stores. Ensure the barrel is in good shape, with no leaks. A well-prepared barrel is key to a successful table.
Creating the Tabletop
Next, cut a piece of plywood or glass to serve as the tabletop. This should fit snugly on top of the barrel. Secure it using brackets or screws to ensure stability. You can also sand and stain the wood to match your outdoor decor.
Finishing and Sealing the Table
Finally, apply a sealer to protect your table from the elements. Some people like to paint the barrel for a splash of colour. This project is not only functional but also adds a unique touch to your outdoor space.
- Materials Needed:
- Steps to Follow:
Crafting a wine barrel table is a simple yet rewarding project that combines functionality with rustic charm. It’s perfect for gatherings or quiet evenings in your backyard.
Designing an Outdoor Pallet Daybed
Creating an outdoor pallet daybed is a fantastic way to add both style and comfort to your garden or patio. This project is simple and cost-effective, making it perfect for DIY enthusiasts of all skill levels.
Building the Daybed Frame
- Gather Materials: You will need several wooden pallets, screws, and basic tools like a drill and saw.
- Prepare the Pallets: Sand down the pallets to remove any rough edges, ensuring a smooth surface for comfort.
- Assemble the Frame: Stack the pallets to create a sturdy base. Secure them together with screws for added stability.
Adding Comfort with Cushions and Accessories
- Choose Outdoor Cushions: Select cushions that are weather-resistant to ensure durability.
- Accessorise: Add throw pillows and blankets for extra comfort and style.
- Define the Space: Consider using an outdoor rug to create a cosy area around the daybed.
Personalising with Paint and Stain
- Paint or Stain the Pallets: This not only protects the wood but also allows you to match the daybed with your outdoor decor.
- Add Decorative Touches: Consider adding fairy lights or lanterns to enhance the ambiance during the evening.
An outdoor pallet daybed is not just a piece of furniture; it’s a charming spot for relaxation and enjoyment in your backyard. By repurposing pallets, you contribute to sustainability while creating a unique outdoor feature.
In summary, designing an outdoor pallet daybed is a rewarding project that combines creativity with functionality. With just a few materials and some effort, you can transform your outdoor space into a comfortable retreat.
Constructing a Concrete Fire Pit
A concrete fire pit can turn your backyard into a warm and inviting space for gatherings. It’s a strong choice that can withstand the weather while adding a stylish touch to your outdoor area.
Materials and Tools Required
To get started, you will need:
- Concrete mix
- Fire pit ring
- Wooden boards (for the form)
- Basic tools (shovel, trowel, level)
Step-by-Step Construction Process
- Choose a Location: Find a flat area in your yard where you want the fire pit.
- Create a Form: Use wooden boards to make a circular shape for the concrete. This will help keep the concrete in place.
- Mix the Concrete: Follow the instructions on the concrete mix bag to prepare it.
- Pour the Concrete: Fill the form with concrete, placing the fire pit ring in the centre.
- Smooth the Surface: Use a trowel to make the top of the concrete even.
- Cure the Concrete: Let it sit for a few days to harden properly.
Enhancing the Fire Pit Area
- Add Seating: Place chairs or benches around the fire pit for comfort.
- Decorate: Use outdoor cushions and throws to make the area more inviting.
- Lighting: Consider adding lights to create a magical atmosphere at night.
A concrete fire pit not only provides warmth but also serves as a beautiful focal point for your outdoor space. Gathering around a fire can create lasting memories with friends and family.
By following these steps, you can create a stunning fire pit that will be the heart of your backyard gatherings!
Making an Adirondack Chair
Choosing the Right Wood
When making an Adirondack chair, selecting the right wood is essential. Here are some popular options:
- Cedar: Lightweight and naturally resistant to decay.
- Pine: Affordable and easy to work with, but may require treatment.
- Teak: Durable and weather-resistant, ideal for outdoor use.
Cutting and Assembling the Pieces
- Gather your materials: You will need treated wood, screws, and basic tools like a saw and drill.
- Cut the wood: Follow a plan to cut the pieces to the correct sizes. Common dimensions include:
Part Size Seat slats 2" x 4" Backrest slats 1" x 4" Legs 4" x 4" - Assemble the chair: Use screws to attach the legs, seat, and backrest together securely.
Painting and Sealing the Chair
- Choose a colour: Pick a paint or stain that suits your style.
- Apply a sealant: This will protect the wood from the elements and extend its life.
- Let it dry: Ensure the chair is completely dry before using it.
Building an Adirondack chair is a rewarding project that adds charm to your outdoor space. With a little effort, you can create a comfortable spot to relax and enjoy the outdoors!
Building a Hammock Stand
Creating a hammock stand is a fantastic way to enjoy the outdoors without needing trees. With just a few materials, you can build a sturdy support system for relaxation. Here’s how to do it:
Materials and Design Options
- Wood or Metal: You can use pressure-treated lumber for a wooden stand, which is weather-resistant. Alternatively, galvanised steel pipes offer a more industrial look.
- Tools Needed: You will need a drill, wood screws, a Kreg jig, and a wood clamp.
Step-by-Step Assembly Instructions
- Cut the Wood: Start by cutting four 4×4 boards to 8 feet long for the main frame.
- Assemble the Frame: Create a simple A-frame or a more complex arc design, depending on your preference.
- Secure the Structure: Use wood screws to secure the pieces together, ensuring everything is tight and stable.
- Add Wheels (Optional): For easy movement, consider adding wheels to the base of the stand.
Adding Finishing Touches
- Seal the Wood: Once assembled, apply a coat of outdoor sealant to protect the stand from the elements. This will help it last longer and require less maintenance.
- Cushions and Accessories: To enhance comfort, add cushions to your hammock. You can also decorate the area around the stand with plants or lights to create a charming atmosphere.
Building a hammock stand not only provides a cosy spot for relaxation but also adds a stylish touch to your backyard. Enjoy your time outdoors!
Creating a Repurposed Door Swing

A repurposed door swing is a fantastic way to add charm to your outdoor area. It not only showcases creativity but also provides a relaxing spot to enjoy the fresh air.
Selecting and Preparing the Door
- Choose an old wooden door that you no longer need. Look for one that is sturdy and in good condition.
- Sand down the door to remove any rough edges or splinters. This step is crucial for safety and comfort.
- Apply a coat of outdoor paint or wood sealant to protect it from the weather.
Assembling the Swing Structure
- Find strong ropes or chains that are suitable for swings. Ensure they can support the weight of the swing and its users.
- Securely attach the ropes or chains to the top corners of the door. Make sure they are tightly fastened to prevent any accidents.
- Hang the swing at a comfortable height, allowing easy access for everyone.
Adding Cushions and Accessories
- Consider adding cushions for extra comfort. Choose outdoor fabric that can withstand the elements.
- You can also decorate the swing with fairy lights or other accessories to enhance its charm.
This DIY project not only saves an old door from being thrown away but also creates a delightful addition to your garden or patio. Enjoy your new swing!
Making Mason Jar Lanterns
Mason jar lanterns are a delightful way to add a warm glow to your outdoor space. They are simple to create and can help set a cosy atmosphere for any gathering.
Gathering Materials and Tools
To get started, you will need:
- Mason jars
- Tea light candles or battery-operated fairy lights
- Decorative items like twine, paint, or ribbons
- Sand or pebbles for stability
Decorating the Jars
- Prepare the jars by cleaning them thoroughly.
- Fill the bottom of each jar with sand or pebbles to keep the candle steady.
- For a stylish touch, wrap twine around the neck of the jar or paint the glass in your favourite colours.
Lighting and Placement Ideas
- Place tea lights inside the jars or use battery-operated fairy lights for safety.
- Hang the lanterns from trees or hooks, or set them on tables.
- Line them along walkways to create a magical path.
Mason jar lanterns are not just functional; they also add a bit of charm to your outdoor decor. They can suit any occasion, from casual gatherings to special celebrations.
With these simple steps, you can create beautiful lanterns that will brighten up your backyard and make it feel inviting!
Choosing Sustainable Wood for Outdoor Furniture
When it comes to building outdoor furniture, sustainability is essential. Choosing the right wood not only helps the environment but also ensures your furniture lasts longer. Here are some popular sustainable wood options:
Popular Sustainable Wood Options
- Cedar: Lightweight and naturally resistant to insects.
- Teak: Known for its rich colour and moisture resistance.
- Redwood: Offers beautiful grain and is durable against the elements.
Benefits of Using Sustainable Wood
- Eco-Friendly: Reduces deforestation and waste.
- Durability: Naturally resistant to decay and pests.
- Aesthetic Appeal: Adds character and beauty to your furniture.
Tips for Maintaining Wood Furniture
- Regularly apply a protective sealant to prevent weather damage.
- Clean with mild soap and water to keep it looking fresh.
- Store indoors during harsh weather to extend its life.
Choosing sustainable wood is not just a trend; it’s a commitment to a healthier planet. By making informed choices, you can enjoy beautiful outdoor furniture that lasts for years.
Safety Tips for DIY Outdoor Furniture Projects
When embarking on DIY outdoor furniture projects, safety should always be your top priority. Here are some essential tips to keep in mind:
Essential Safety Gear
- Wear Protective Equipment: Always use goggles, gloves, and a dust mask to shield yourself from debris and dust.
- Use Ear Protection: If you’re using loud tools, consider earplugs or earmuffs to protect your hearing.
- Non-slip Footwear: Wear sturdy shoes to prevent slips and falls while working.
Organising Your Workspace
- Keep It Tidy: A cluttered workspace can lead to accidents. Ensure that all tools and materials are stored properly.
- Clear Pathways: Make sure there are no obstacles in your work area to avoid tripping.
- Proper Lighting: Ensure your workspace is well-lit to see clearly while working.
Safe Handling of Tools and Materials
- Read Instructions: Familiarise yourself with the tools and materials before starting your project.
- Secure Materials: Always clamp wood securely to prevent it from moving while cutting.
- Take Breaks: Fatigue can lead to mistakes, so take regular breaks to stay focused.
Being aware of these precautions helps prevent injuries and ensures a smoother project experience. Safety should always come first to enjoy the DIY journey.
By following these safety tips, you can create a fun and secure environment for your DIY outdoor furniture projects, making your backyard a charming retreat for gatherings.
Finishing Touches for Outdoor Furniture

The final steps in your DIY outdoor furniture projects can really make a difference in how they look and feel. Adding the right finishes and accessories can enhance both style and comfort.
Painting and Staining Techniques
Choosing the right paint or stain is essential for outdoor furniture. Here are some tips:
- Use weather-resistant products to protect against moisture and UV rays.
- Prepare the surface by sanding it down to create a smooth base.
- Apply multiple coats if needed, allowing time for drying in between.
| Type of Finish | Benefits | Recommended Use |
|---|---|---|
| Weather-resistant paint | Protects against fading | Outdoor furniture |
| Stain with mildewcide | Prevents mould growth | Wooden surfaces |
| Clear sealant | Enhances natural wood | All wood types |
Choosing and Adding Cushions
Cushions not only improve comfort but also add a splash of colour. Here’s what to consider:
- Select outdoor fabric that resists fading and moisture.
- Look for removable covers for easy cleaning.
- Mix and match patterns for a lively look.
Incorporating Decorative Accessories
Accessories can tie your outdoor space together. Consider these ideas:
- Accent pillows for added comfort and style.
- Outdoor rugs to define seating areas.
- String lights for a warm, inviting atmosphere.
Remember, the finishing touches can transform your outdoor furniture into a charming and inviting space. Take your time to choose the right elements that reflect your personal style and enhance your backyard experience.
Final Thoughts on DIY Outdoor Furniture
In conclusion, crafting your own outdoor furniture can truly enhance your backyard experience. Not only does it allow you to save money, but it also gives you the chance to express your creativity. From simple pallet sofas to charming mason jar lanterns, there are projects for everyone, no matter your skill level. These DIY ideas can transform your outdoor space into a welcoming area for relaxation and gatherings. So gather your materials, unleash your imagination, and enjoy the satisfaction of creating unique pieces that reflect your personal style.


ETHRA AI Reports Strong Early Momentum as Stage 1 Presale Reaches 11% Completion

Understanding Comparative Negligence in Jacksonville Personal Injury Cases

LiquidWhales Goes Live: The First Hyperliquid Whale Tracker That Grades Every Wallet Net of Fees — and Lets You Copy the Winners in One Click

SolForger Launches as a Non-Custodial Solana Developer Platform for Builders, Creators, and On-Chain Projects

Securing the Future: Jayen Consulting Officially Migrates to a New Digital Domain

Focusing on Compliance, Truoux Advances MAS License Application

Truoux Advances UK FCA License Application, Deepens Compliance Strategic Layout

Truoux Optimizes Risk Control and AML Systems, Accelerating the RMO and DAX License Application Process

Rovum Builds Momentum in On-Chain Settlement Markets

Is Professional Mold Testing Worth It?

Why Small Shipping Boxes Are Becoming the Default for 25-unit Trial Runs

Radio Ads and Personal Spending: Where Prosecutors Allege the Dynamic Money Millions Went

The $34 Million Deception: Where the Guam Charity Bingo Money Really Went

Celeste White’s Influence on Sustainable Agricultural Practices in Napa Valley

Inside the 12-Count Federal Indictment Against Fugitive Darren Anthony Robinson

-
 Business3 days ago
Understanding Comparative Negligence in Jacksonville Personal Injury Cases
-
 Press Release6 days ago
LiquidWhales Goes Live: The First Hyperliquid Whale Tracker That Grades Every Wallet Net of Fees — and Lets You Copy the Winners in One Click
-
 Press Release3 days ago
ETHRA AI Reports Strong Early Momentum as Stage 1 Presale Reaches 11% Completion